The stress of having a last-minute hair crisis is all too familiar – the clock is ticking, and your locks remain limp with no clear plan in sight. Fear not, dear reader! With some forward thinking, this predicament can be averted. To ensure you’re always prepared for a beauty emergency, we’ve compiled 16 effortless yet sophisticated hairstyles that can be mastered in under 24 hours.
Whether you’re short on time or lacking expertise, these styles are designed to be quick-fix solutions, perfect for DIY hairstyling at the last minute.
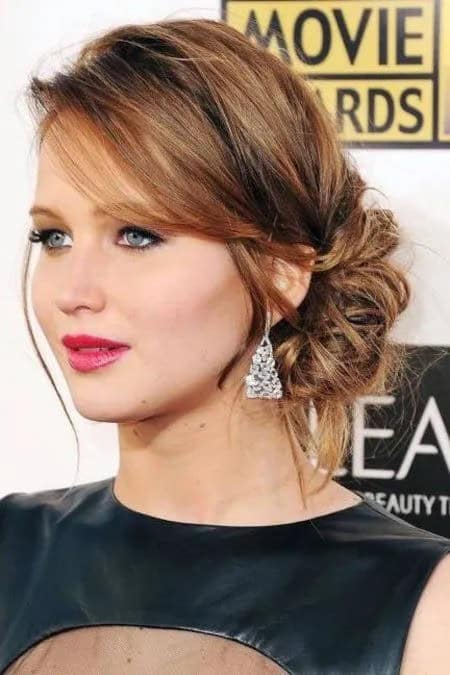
The Messy Side Bun
To create this elegant updo, begin by starting with curly hair and a deep side part. Next, gather all the hair and secure it to the opposite side of the part using a gentle tying motion. This will form the foundation of the style. Then, take a few stray strands of hair and wrap them around your head, curling them once more before allowing them to cascade down loose.
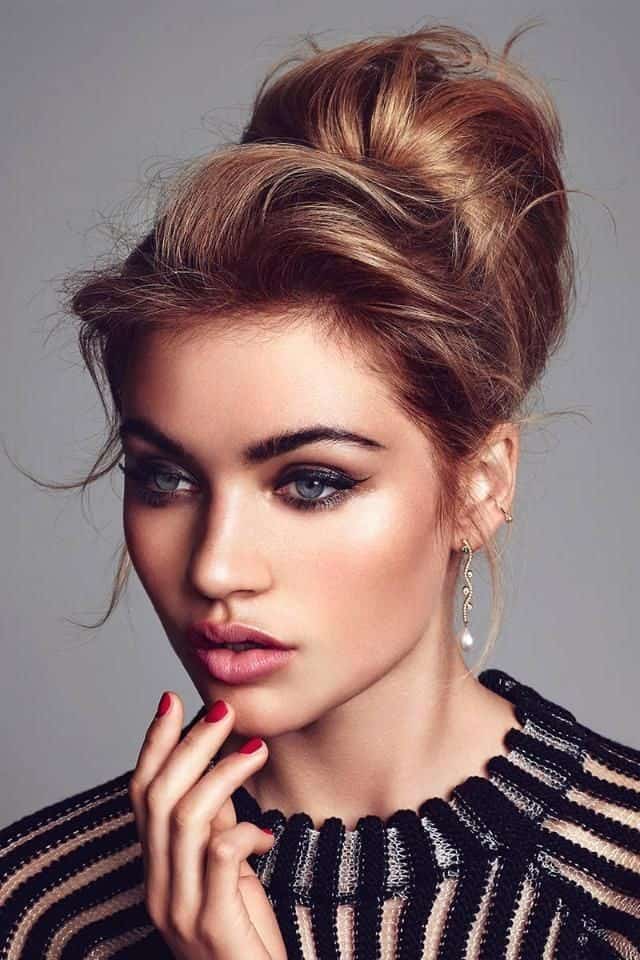
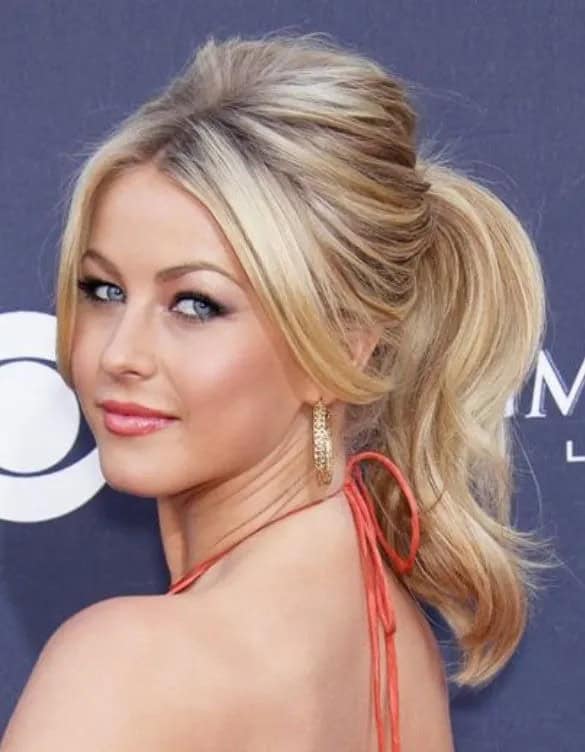
The High Bun
To achieve this chic hairstyle, you’ll need a hair donut or a similar styling tool. Begin by creating a ponytail at the desired location for your bun. Next, slide the donut onto the end of the ponytail, ensuring it’s securely in place. Gently roll the donut downwards towards your scalp, taking care to keep the tension even and avoid any creasing or bunching. Once you’ve reached the starting point, pin the style into place to secure it, and voilà! Your bun is complete.
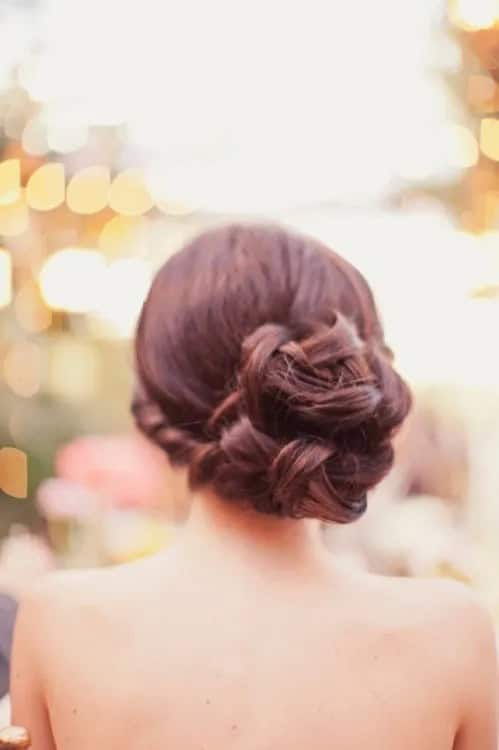
The Braided Bun
To create a voluminous braided bun, begin by sectioning off a portion of hair where you want the bun to sit. Then, braid this section as desired, keeping in mind that the end result will be wrapped around itself to form a bun shape. As you braid, secure it with pins to maintain the structure. Once complete, gently fluff and tug on the braids to maximize volume and achieve a full, rounded appearance.
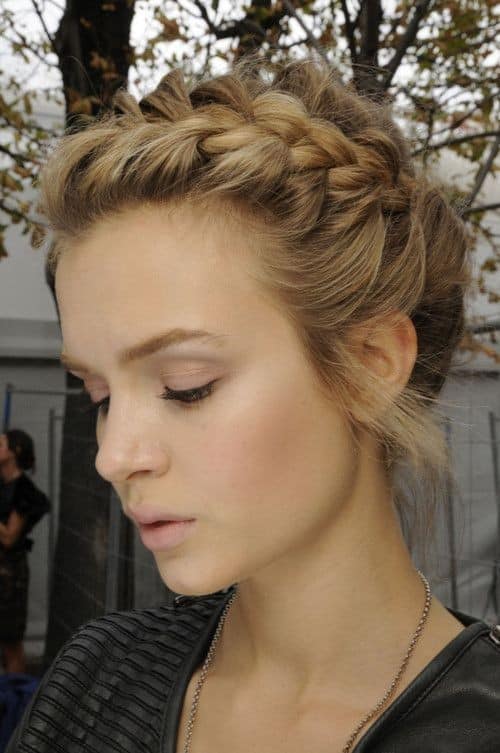
The Braided Crown
To initiate a Dutch braid, begin at the crown of your head, just above the ear. As you work along the hairline, seamlessly integrate additional strands of hair into the braid. When all available hair has been incorporated, transition to Dutch braiding the remaining locks alone. Once the braid reaches its desired length, secure it around the crown with pins and tuck away any stray ends.
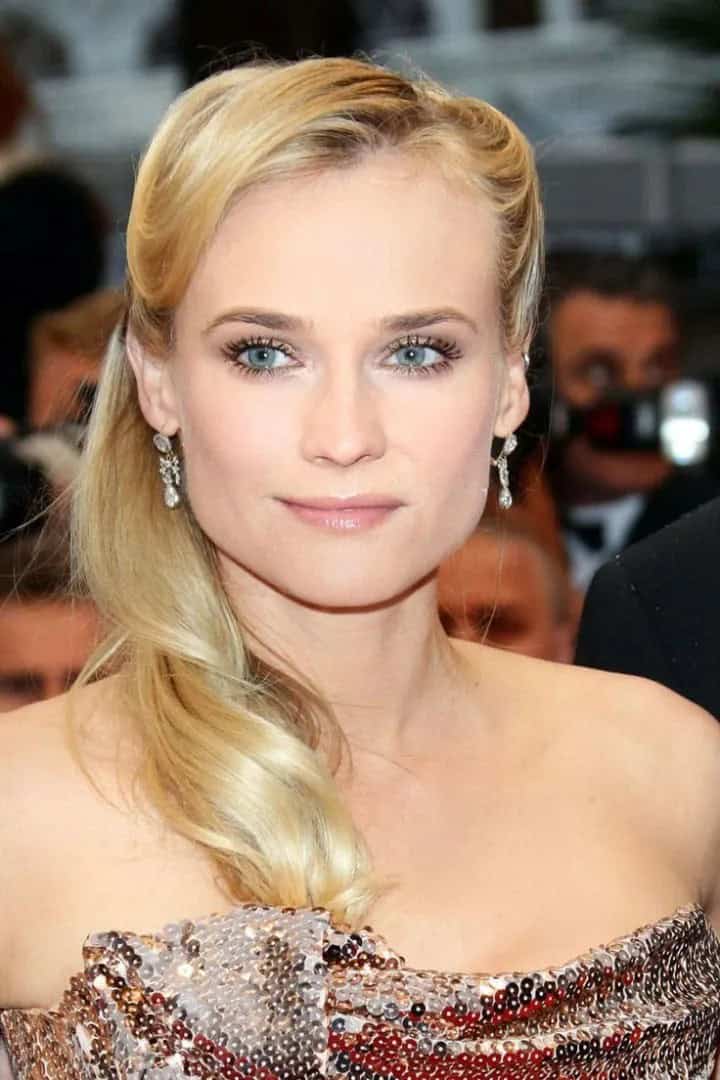
The Wrapped Ponytail
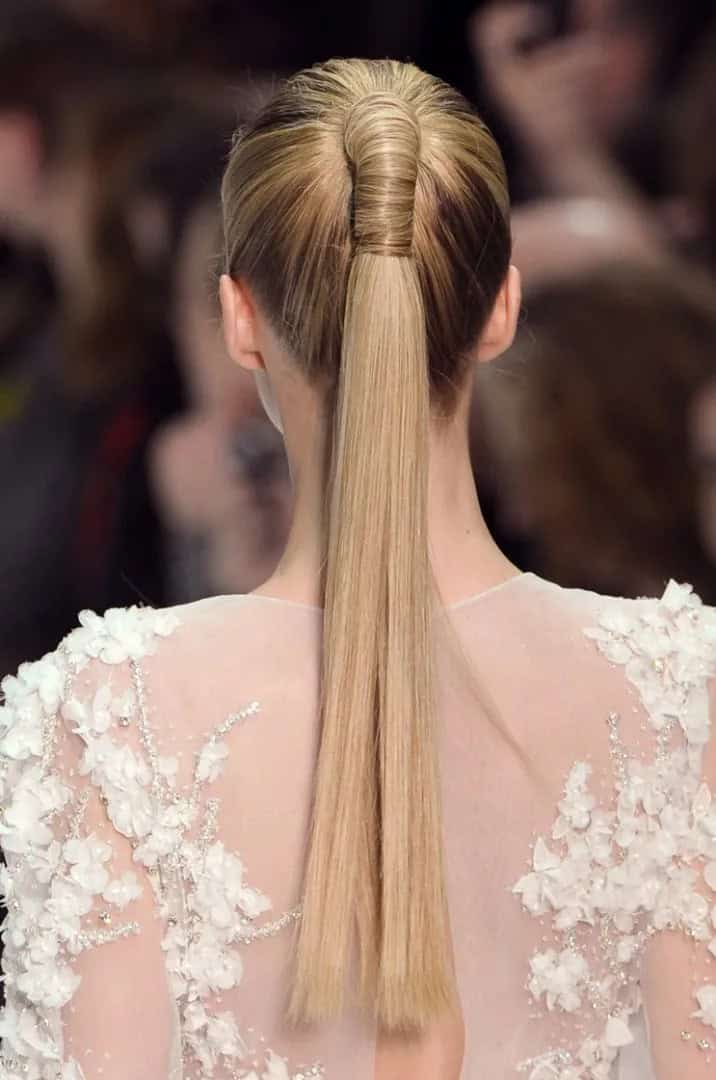
Elevate your hairstyle game with these effortless yet elegant looks that require minimal effort. Starting with the basics, create a regular ponytail and then add some flair by wrapping and pinning a strand of hair along the base. This versatile style can be dressed up or down, making it perfect for any occasion.
To achieve this look, try one of the following variations:
1. Messy side bun: Pair a side part with an undone ponytail and secure with bobby pins for a relaxed, effortless vibe.
2. High bun: Tease the hair at the crown to add volume, leaving a few loose strands to frame the face before securing with a hair tie.
3. Braided bun: Braid a section of hair and wrap it around the ponytail base, securing with bobby pins for a chic, whimsical look.
4. The braided crown: Braid a crown shape and secure with bobby pins, adding a few loose strands to frame the face for a romantic touch.
5.
Wrapped ponytail: Tease the hair at the crown, tie the ponytail low on the neck, and wrap a strand of hair around the base before securing with bobby pins. Add some curls to the ends for a glamorous finish.
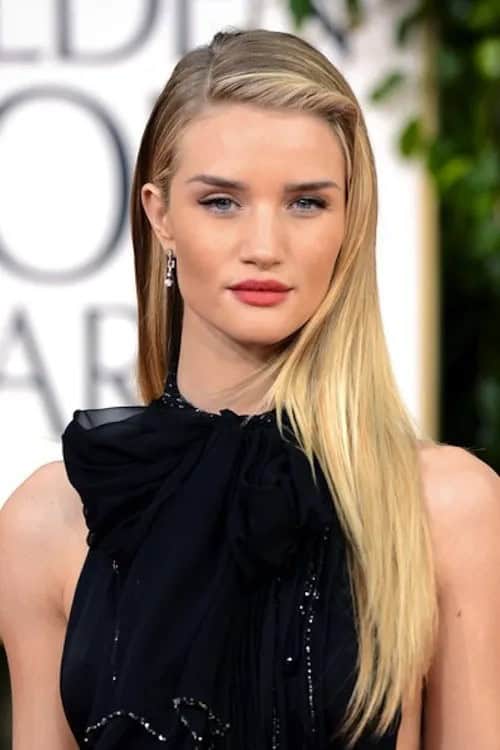
Sleek And Straight
Achieving this sleek and polished hairstyle requires just a few simple steps. First, make sure to apply a heat protectant product all over your hair before straightening it. For an added touch of glamour, take the extra time to twist and pin the front section, creating a stunningly stylish look.
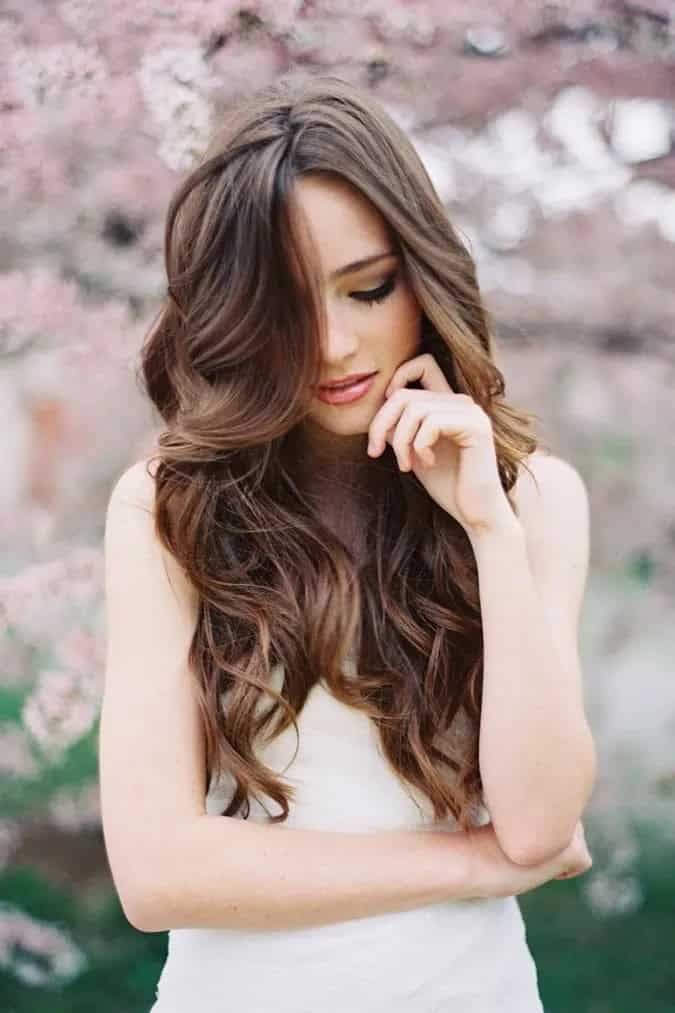
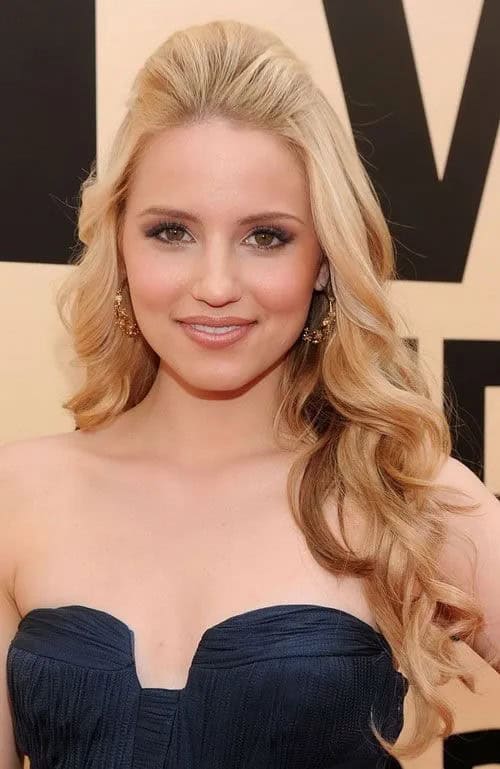
Loose Waves
To achieve this stunning hairstyle, start by using a curling wand or straightener to add volume and texture to your locks. Once you’ve curled all of your hair, gently rake your fingers through the curls to loosen them up and create a more relaxed, effortless vibe. To set the style in place and ensure it stays put all day, finish off with a light hold hairspray that won’t weigh down your beautiful curls.
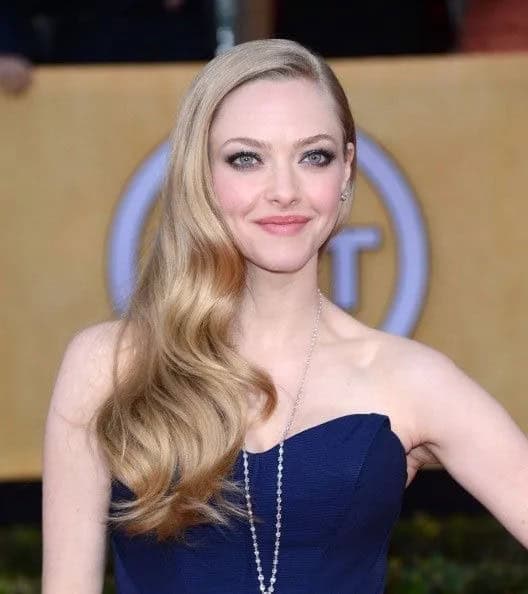
Side Swept Glam Curls
To achieve voluminous curls, employ a curling wand equipped with a larger-than-usual barrel. As you work through your locks, take care to gently tease apart each curl with your fingertips. Next, corral all the hair towards one flank and secure it at the base of the neck using a bobby pin, thereby preventing any stray strands from drifting across to the opposite side.
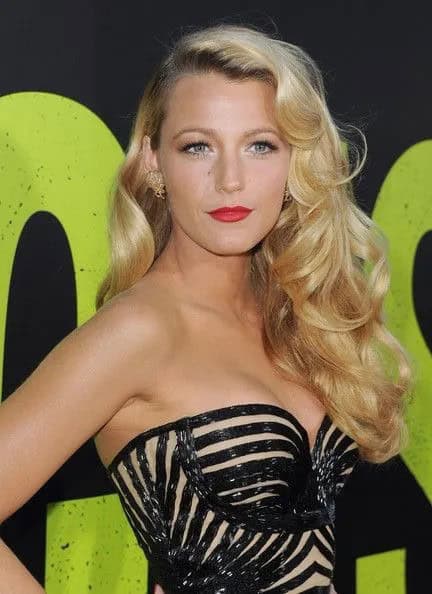
Old Hollywood Curls
To achieve the desired look, start by wrapping all of your hair around a large curling iron. Be sure not to release the curls once you’ve finished as they will unfold quickly. To prevent this, secure them in place using bobby pins and allow them to cool naturally for a few minutes. Once the curls have cooled, gently remove the pins and brush your hair to reveal a beautifully defined style.
Old Hollywood Half Up-Do
Half Up, Half Down Curly Up-Do
To create this iconic hairstyle, begin by sweeping all loose hair away from your face. Next, use your fingers to tease the hair at the crown into a compact beehive shape. Then, gently pull the front sections of your locks towards the back and secure them in place using bobby pins or a hair tie. This foundation will provide the perfect base for the rest of the styling process.
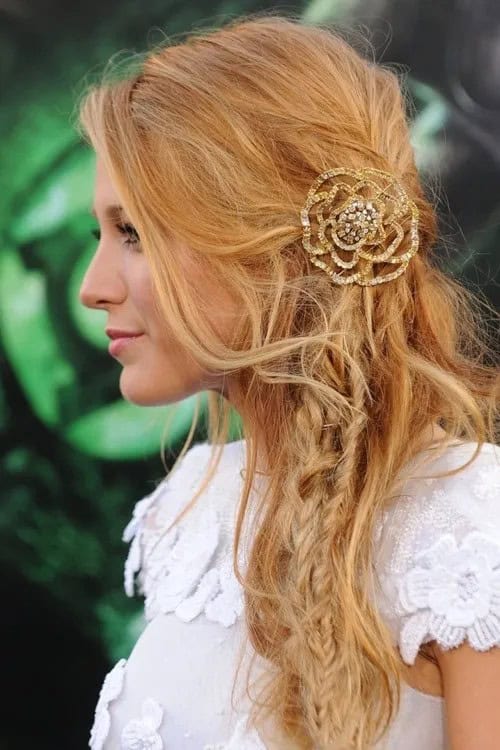
Half Up, Half Down With Braids
For a laid-back yet stylish hairstyle, try incorporating loose braids into your look. Begin by weaving together random strands of hair, embracing any imperfections that may arise in the process. Next, sweep the top portion of your locks to one side and secure it with a decorative pin, adding a touch of elegance to the overall effect.
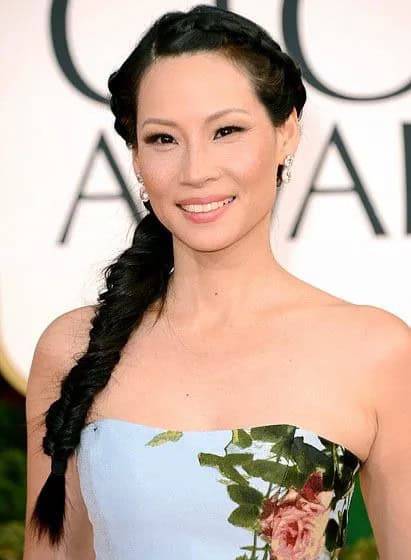
Side Braid
When it comes to pairing hairstyles with outfits, one of the most striking combinations is a large side braid and a strapless dress. To create this look, start by prepping your locks – if you want to add some extra volume to the top section, now’s the time to tease it. Alternatively, skip this step altogether and dive straight into braiding. For a more textured look, consider opting for a fishtail braid, which will add plenty of visual interest to your overall style.
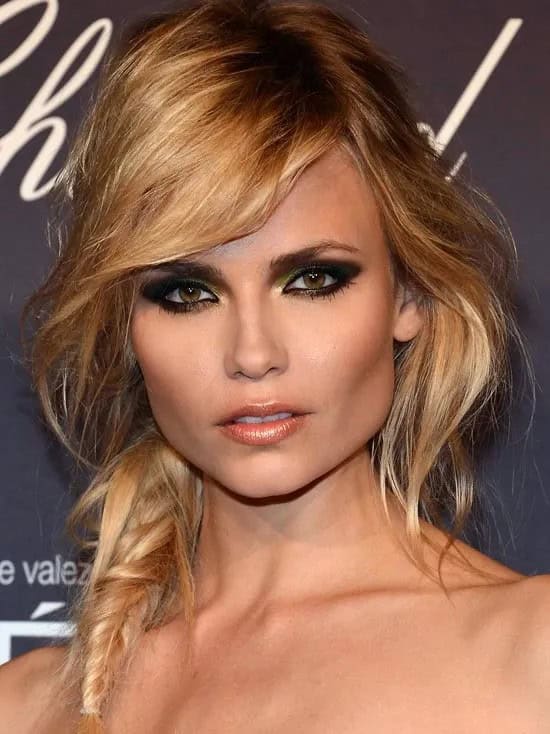
Messy Side Braid
To achieve this effortless yet chic hairstyle, begin by teasing your hair to create a bit of texture and volume. Next, gather a section of hair to one side and start braiding, gently pulling the strands as you go to create a relaxed, undone look. Don’t worry if some stray hairs pop out along the way – this is all part of the charm. To really make the style stand out, pair it with a bold, smoky eye look for maximum contrast and a glamorous finish.
The Fauxhawk
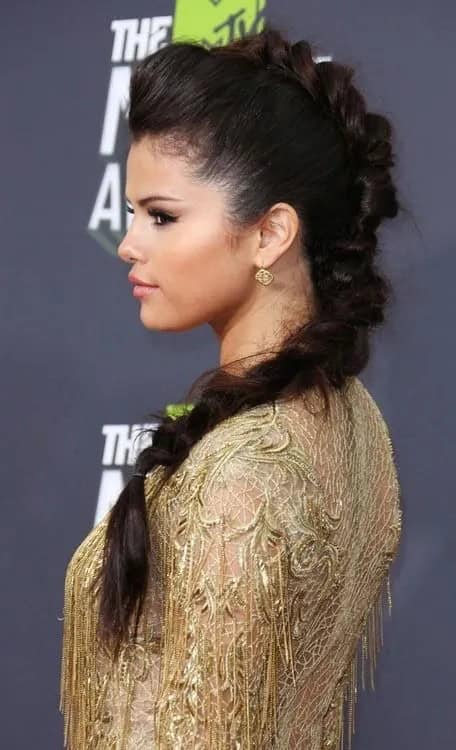
Begin by teasing the crown section of your hair and then transition into a Dutch braid, gently incorporating more strands as you go. Ensure the sides are sleekly pulled back before finishing the braid. To add volume and texture, gently tug on both sides of the style. With this foundation in place, you’ll be well-equipped to tackle other styles like half-up half-down with curls, half-up half-down with braids, side braids, messy side braids, or even a fauxhawk.
Having a repertoire of these hairstyles will simplify your decision-making process when faced with uncertainty the next time you’re standing in front of a mirror.